

My Workflows
The My Workflow page will show all workflow tasks the user has assigned.
Under the menu on the left-side of the screen, click the Workflows button, or go to Workflows > My Workflows within the menu.
Here, you can filter by Workflow Name, Task, Cabinet, Folder, Sub-Divider, Doc Type, Doc Name, Doc Date, Document Content, Document Metadata, and Assigned To.
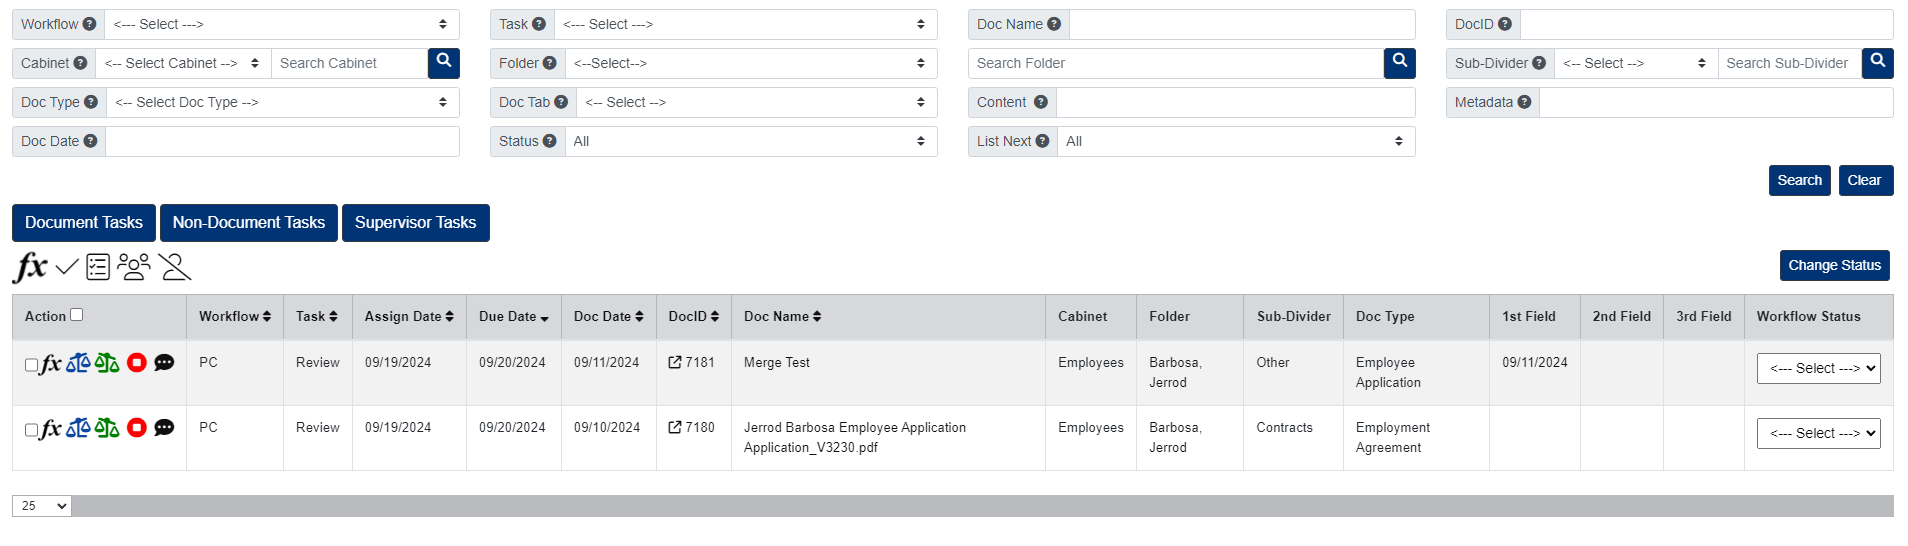
Document View
To view a quick view of a document, click the DocID.
To launch a document to the File Review page, click the Doc Name.
Add Comments to Workflows
- Under the Action column, click the comment button next to the workflow task.
- In the pop-up window that appears, enter your comment, then click Submit.
- The comment button will turn red when there is a comment.
Start a Workflow Task (if required)
- Under the Action column, click the Start button to start the task.
- In the pop-up window that appears, enter the Start Date, then click Start.
Start Multiple Workflow Tasks (if required)
- Under the Action column, select all tasks you want to start.
- Click the Start Task button located above your assigned workflow tasks, then click Yes to confirm.
Complete a Workflow Task
If you do not need to view the document before you complete your task:
- Under the Action column, click the Complete Task button next to the task you want to complete.
- Click Yes to confirm.
If you need to view the document before you complete the task:
- Click the DocID for a quick view of the document or click the Doc Name to launch the document to the File Review page. Both options will display the complete task button for you to complete your task.
Complete Multiple Workflow Tasks
- Under the Action column, select all tasks you want to complete.
- Click the Complete Task button located above your assigned workflow tasks, then click Yes to confirm.
Change the Status for Workflow Tasks
- Under the Action column, select all workflow tasks you want to assign a new status to.
- Then, under the Workflow Status column on the right, select the new status from the dropdown menu for all tasks you selected.
- Click the Status Change button located above the Workflow Status column.
Change Task
- Click the Fx button next to the task you want to change.
- Click the button next to Change Task.
- In the pop-up window that appears, select the new task, then click Submit.
Add a Non-Document Workflow
- Click the Non-Document Tasks button.
- Click the Add Non-Document Workflow button.
- In the pop-up window that appears, enter the Name of the workflow, then select the Workflow you want to assign.
- Click the Start button.
Start a Non-Document Workflow
- Under the Action column, click the start workflow button.
- Enter the Start Date, then click Start.
Start Multiple Non-Document Workflows
- Under the Action column, select all non-document tasks you want to start.
- Click the Start Task button located above your workflow tasks.
- Click Yes to confirm.
Complete a Non-Document Workflow Task
- Under the Action column, click the Complete Task button.
- Click Yes to confirm.
Complete Multiple Non-Document Workflow Tasks
- Under the Action column, select all non-document tasks you want to complete.
- Click the Complete Task button located above your workflow tasks.
- Click Yes to confirm.
Change the Status for a Non-Document Workflow Task
- Under the Action column, select all non-document workflow tasks you want to assign a new status to.
- Then, under the Workflow Status column on the right, select the new status from the dropdown menu for all non-document tasks you selected.
- Click the Status Change button located above the Workflow Status column.
Change Task for a Non-Document Workflow
- Under the Workflow column, click the Change Task button for the non-document task you want to change.
- In the pop-up window that appears, select the new task, then click Submit.