Manage Workflows
Workflows are designed to be distributed to your users when it is their turn to do a task for a document.
From the menu on the left-side of the screen, click Admin, then click Workflows under the first column: Fileroom Management.
Add Workflow
- To begin, click the Add Workflow button.

- In the pop-up window, enter the Workflow Name and Description.
- Manual Start: If this box is checked, users will be required to manually start their task in the workflow.
- Hide: If this box is checked, the document assigned to the workflow will be hidden to users not assigned to the workflow until all tasks in the workflow has ended.
- Click the Save button when finished.
- After saving, click the Task Details button under the Actions column for the workflow.

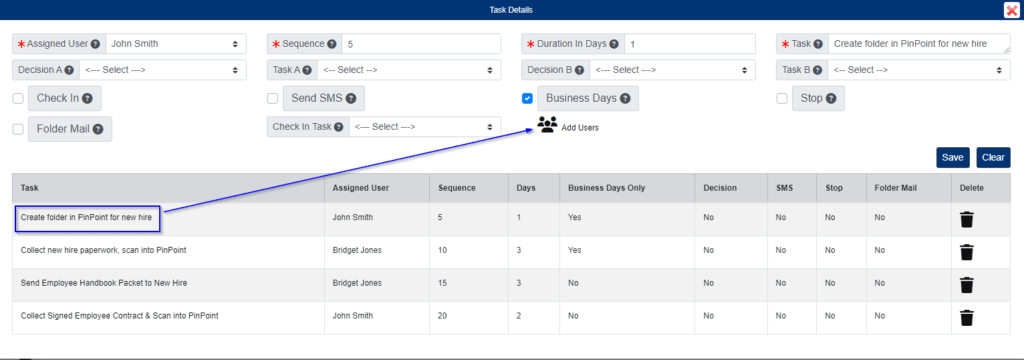
- In the pop-up window…
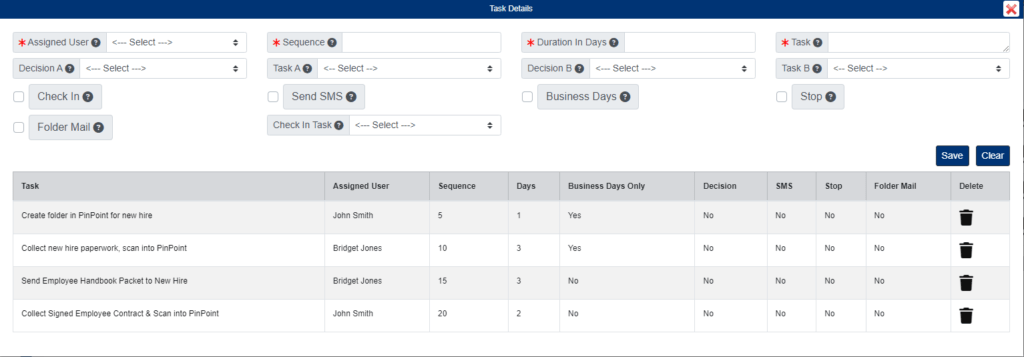
- Select the Assigned User.
- Enter the Sequence number (step order lowest to highest).
- Enter the Duration in Days for the task.
- Enter the Task description.
- Click the Save button when finished.
If you need to make the task a group task, click the Task, then use the Add Users button to include other users. Only one user will need to complete the task for the whole group.
After you have finished adding the task details for the workflow, you can assign supervisors to the workflow using the Assign Supervisors button under the Actions column.
Assign Workflow
Workflows can be assigned to automatically begin when a specific Doc Type is added, they can be assigned as recurring workflows based on a set number of days, or a user can assign a custom workflow date for a document.
Assign Workflow to a Doc Type:
- From the user menu on the left side of the page, start by clicking Admin, then click the Doc Types button under the menu, or on the Admin Dashboard.
- Select the document type you want to assign an automatic workflow to by selecting it under the Doc Types column.
- In the pop-up window, select the workflow you want to assign to the document type by using the Workflow field.
- If you would like to set a recurring workflow for the document type, use the Recurring Workflow field instead, then set the Number of Days.
- Click the Save button when ready.
Assign Workflow to an Individual Document:
- Open the document to the File Review page.
- On the left side of the page, select the workflow you want to assign using the Workflow field.
- If you would like to assign a start date for the workflow, use the Delayed Workflow Date field.
- Click the Save button at the top or bottom the page when ready.
Decision Task
Rather than assign users a normal workflow task, you can assign them a “decision task” which gives them two options for completing their Task. When setting up a decision task, you will assign a task to Option A and a different task to Option B.
- Start by selecting the Assigned User.
- If you need to make the task a group task, use the Add Users button to include other users. Only one user will need to complete the task for the whole group.
- Enter the Sequence number (step order is lowest to highest).
- Enter the Duration in Days for the task.
- Enter the Task description.
- Select the workflow for Decision A, then select the task using the Task A field.
- Select the workflow for Decision B, then select the task using the Task B field.
- Click the Save button when finished.
When the user is assigned a task, the user will be required to select Option A or Option B.
Check-In Task
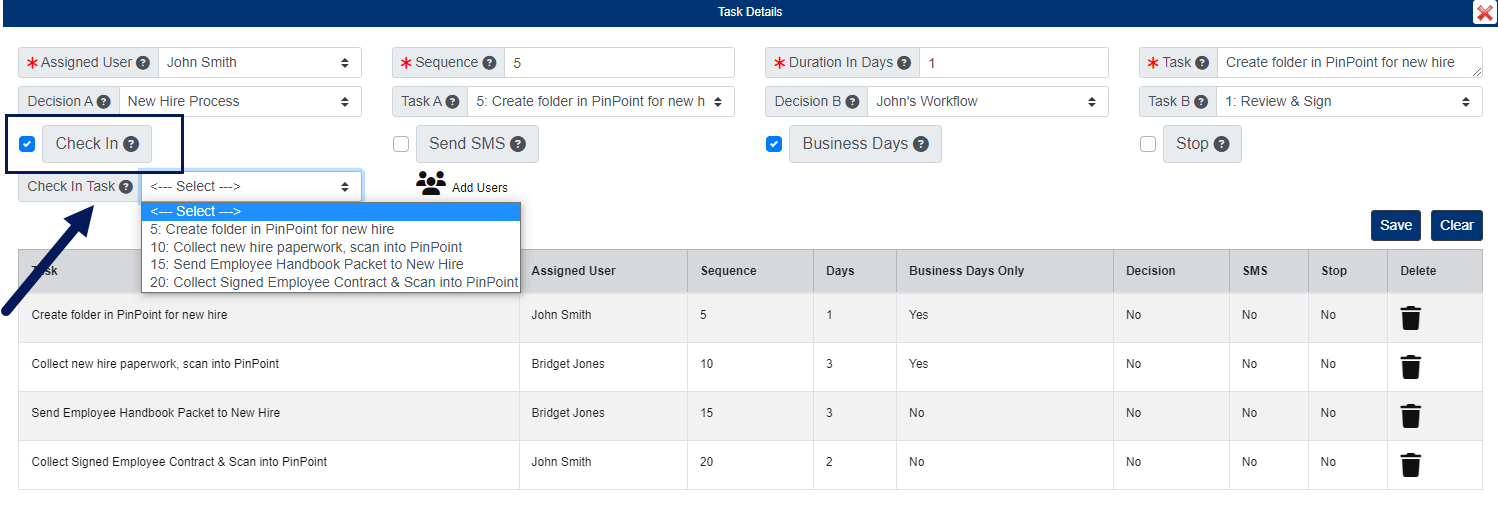
If a particular task requires a user to check the document out for updating, you can have the workflow restart a specific task when the document is checked back into PinPoint.
- Start by selecting the Assigned User.
- If you need to make the task a group task, use the Add Users button to include other users. Only one user will need to complete the task for the whole group.
- Enter the Sequence number (step order lowest to highest).
- Enter the Duration in Days for the task.
- Enter the Task description.
- Check the box for Check In, then select the task to trigger when the document is checked back in using the Check In Task field.
- Click the Save button when finished.
If the user assigned to the task checks a document out and then back in when the task is assigned, the Check In Task will trigger automatically.
Workflow Statuses
- Click the Workflow Statuses button located at the top of the page.
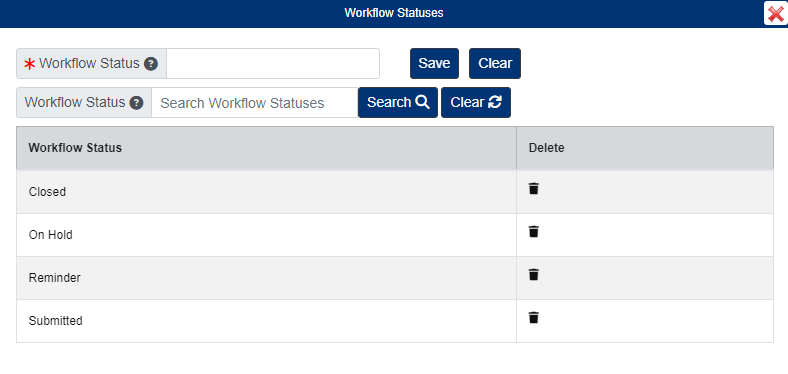
- Enter the Workflow Status name.
- Click the Save button.
Workflow Business Rules
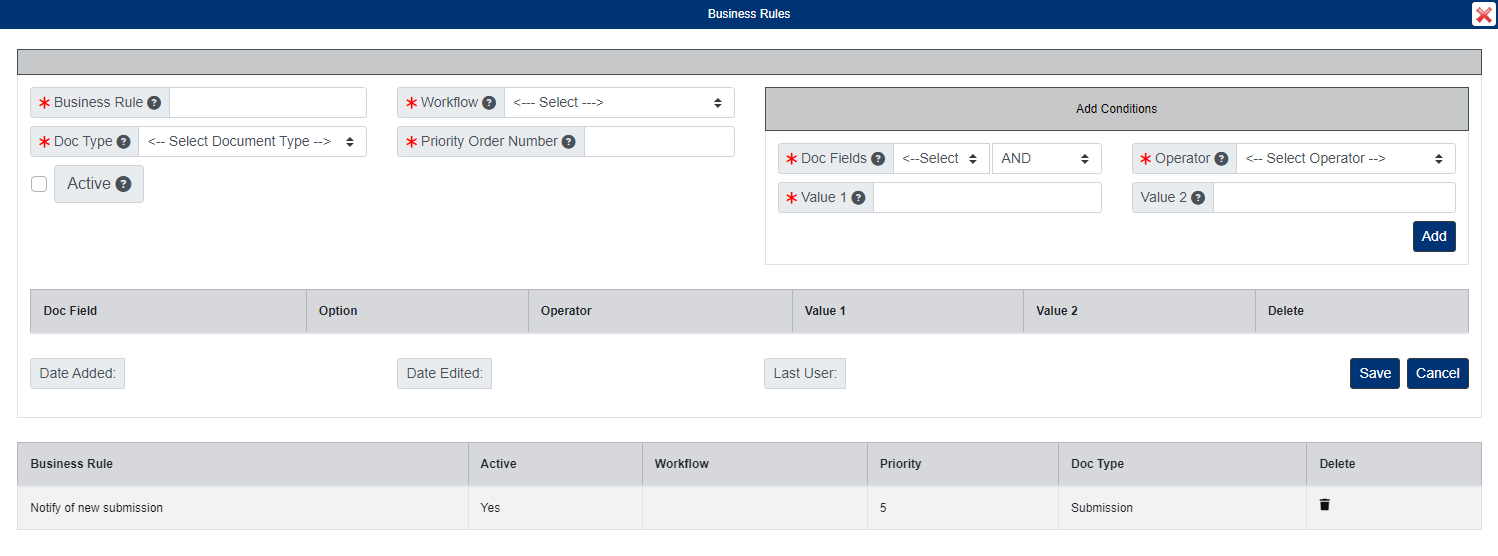
Workflow Business Rules are used to auto trigger workflows based on specific document metadata.
- Click the Business Rules button located at the top of the page.
- Enter the Business Rule name.
- Select the Workflow.
- Select the Doc Type.
- Enter the Priority Order Number.
- Check the Active box.
- Under Add Conditions, select the Doc Field you wan to use for the rule.
- Select the Operator, then enter the data in Value 1.
- Click the Add button when finished.
When a new file is added as the Doc Type you selected for the business rule and it contains the data you entered for Value 1 in the metadata field you assigned, the workflow you set in the business rule will automatically be triggered.


