
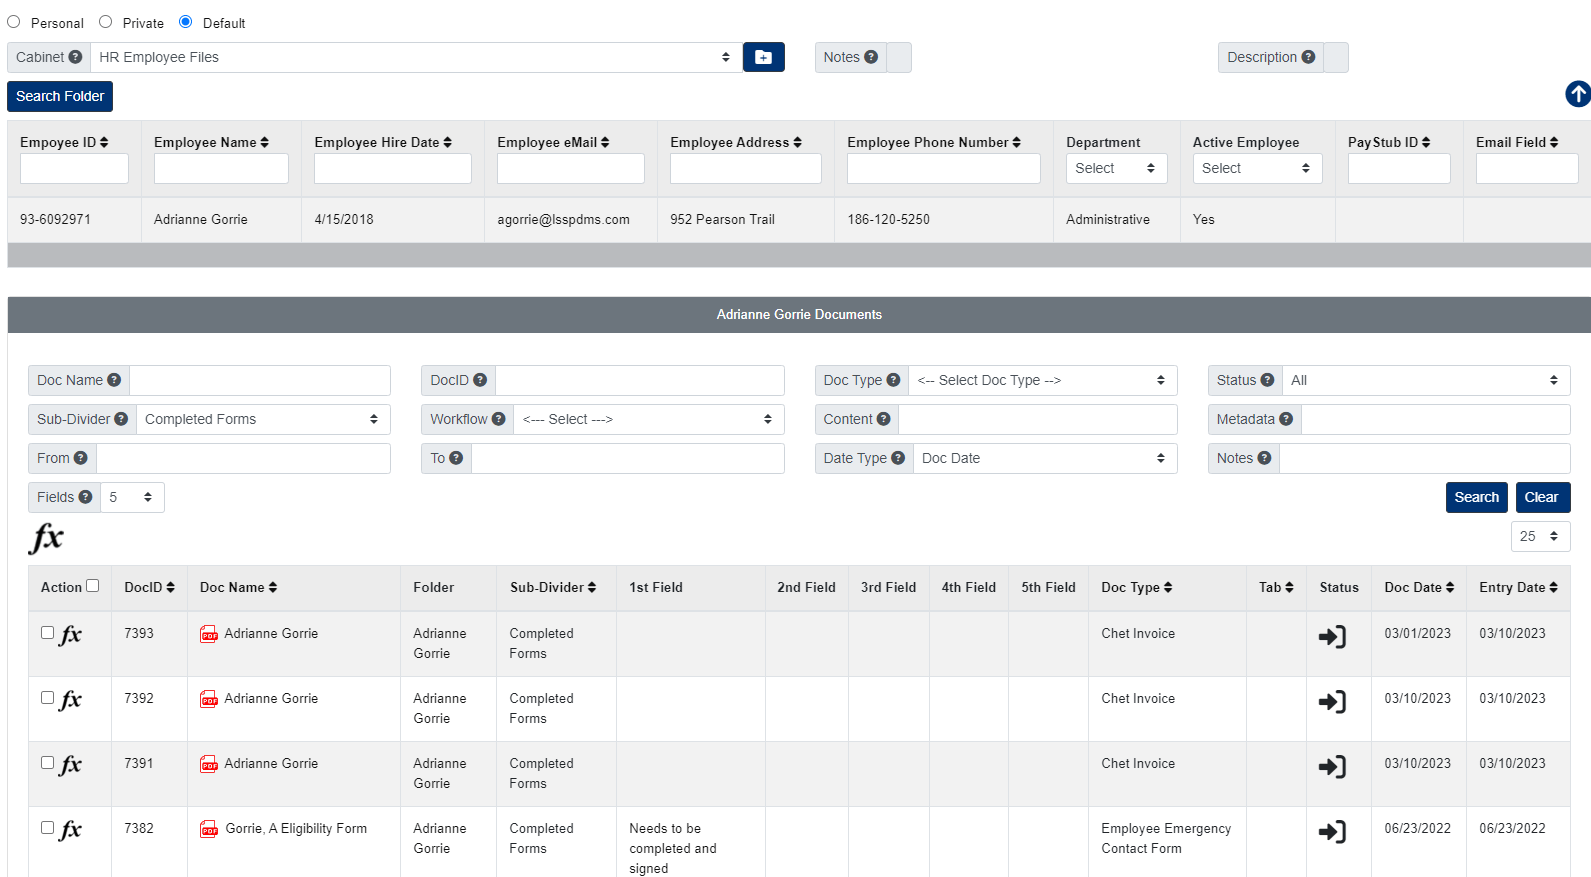
Folder Details
Using the Folder Details search, users can search for folders within the selected cabinet, using all the folder detail fields.
The top section of this page is where you choose your cabinet, the middle section displays all folders within the selected cabinet and the third section displays all documents within the selected folder.
From the menu on the left side of the screen, first select “Locating”, and then click “Folder Details.”
Search Documents
- Select the Cabinet you want to open.
- Search and select the Folder you want to open.
- Once you open the folder, you will be taken to the bottom of the page where all documents in the folder will be listed.
- The section above the documents list is used for searching documents within the folder:
- Doc Name: This allows a user to search for a document by name. This is a wildcard search, so the system will look at any part of the name.
- DocID: This allows a user to search for a document ID number.
- Doc Type: Each document that is added to PinPoint must be labeled by a document type, so this will always be a useful way to sort/filter.
- Doc Tab: This can be used to located a document that is labeled with a Doc Tab.
- Status: There are four different statuses of a document.
- Checked In: This is the normal status of a document in PinPoint.
- Checked Out: This means the document has been checked-out of PinPoint by another user. If a document is checked-out by another user, it is in read-only mode for all other users until the user who checked it out checks it back into PinPoint.
- On Hold: If a document has been put “On Hold”, it means it is in read-only mode, though has not been checked-out by a user.
- Finalized: If a document has been “finalized”, it means it can no longer be modified by any user.
- Sub-Divider: This is the bottom level in PinPoint. Sub-dividers store documents and are used to organize documents within folders.
- Workflow: This allows the user to display only documents that are part of an active workflow the user belongs to.
- Content: If you type content in this field and search, the system will only display documents that contain that content within the pages of the document. Please keep in mind that it will likely not pick-up hand-written content.
- Metadata: If a document has had any of its document metadata fields filled in, a user can search by the text that has been filled in to locate a document. Additionally, users can filter by Folder metadata fields, as well.
- Date Range: There are three different date types for a document.
- Document Date: This is the only date a user can manually change for a document.
- Entry Date: This is the date of when the document was added to PinPoint.
- Updated Date: This is the date of when the document was last updated.
- Notes: This field can be found at the bottom of the screen when you have a document open. The Notes field does not have a character limit and all text inputted can be searched on.
Document View
To view a quick view of a document, click the DocID.
To launch a document to the File Review page, click the Doc Name.
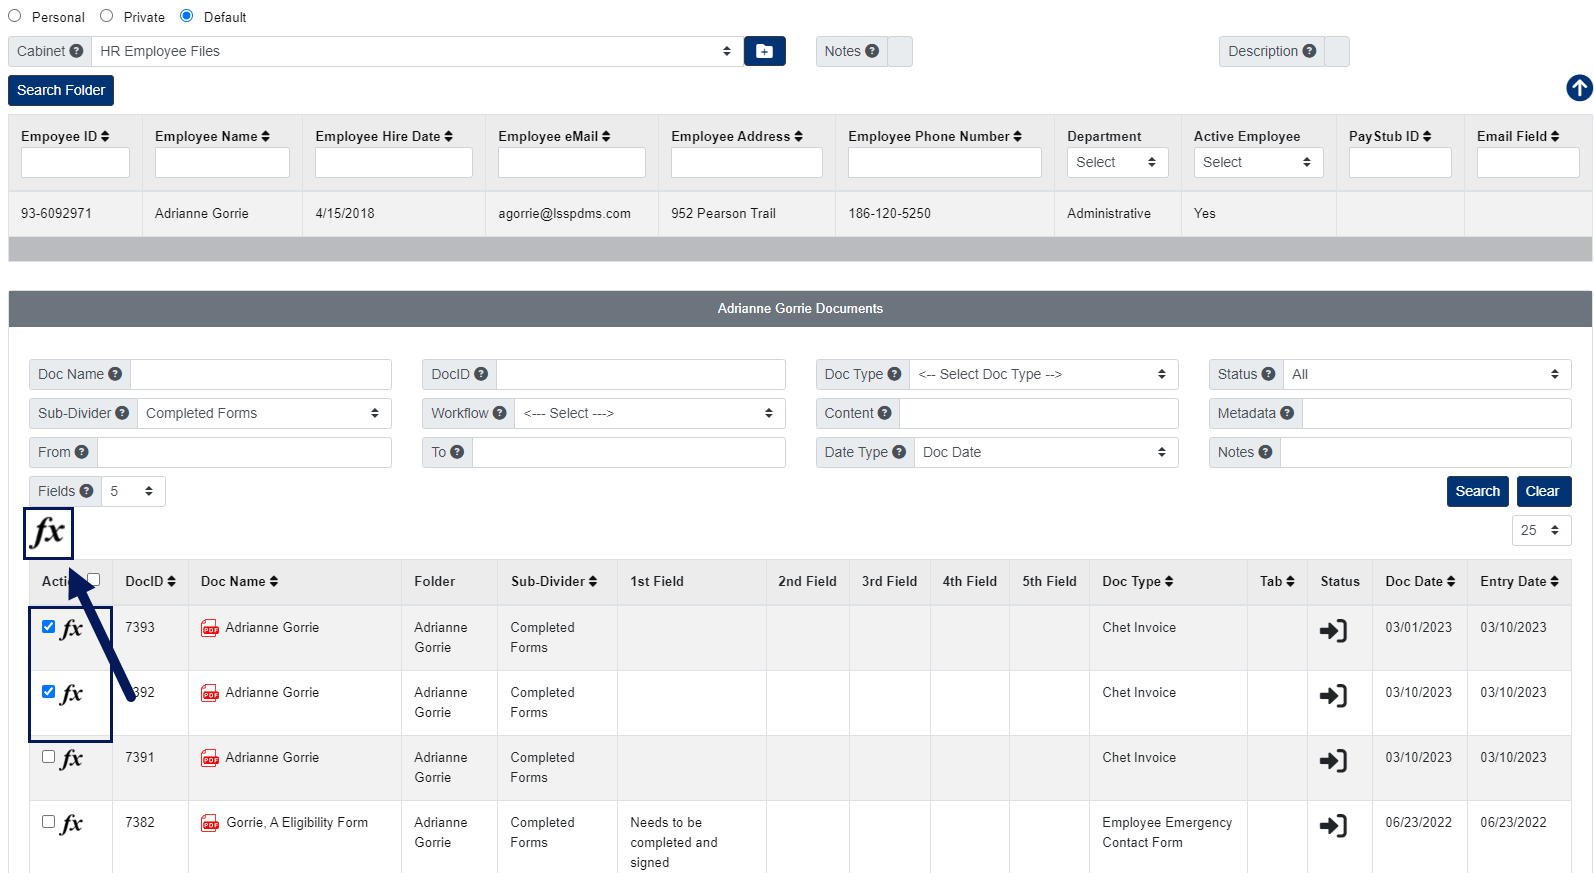
Document Handling (Multiple Documents)
- Select the documents you want to handle, then click the Fx button located above the documents list.
- The Fx menu will list all functions you have the permissions for.
Add Documents
- At the top of the page, select the Cabinet you want to open.
- Locate and select the Folder you want to add documents to.
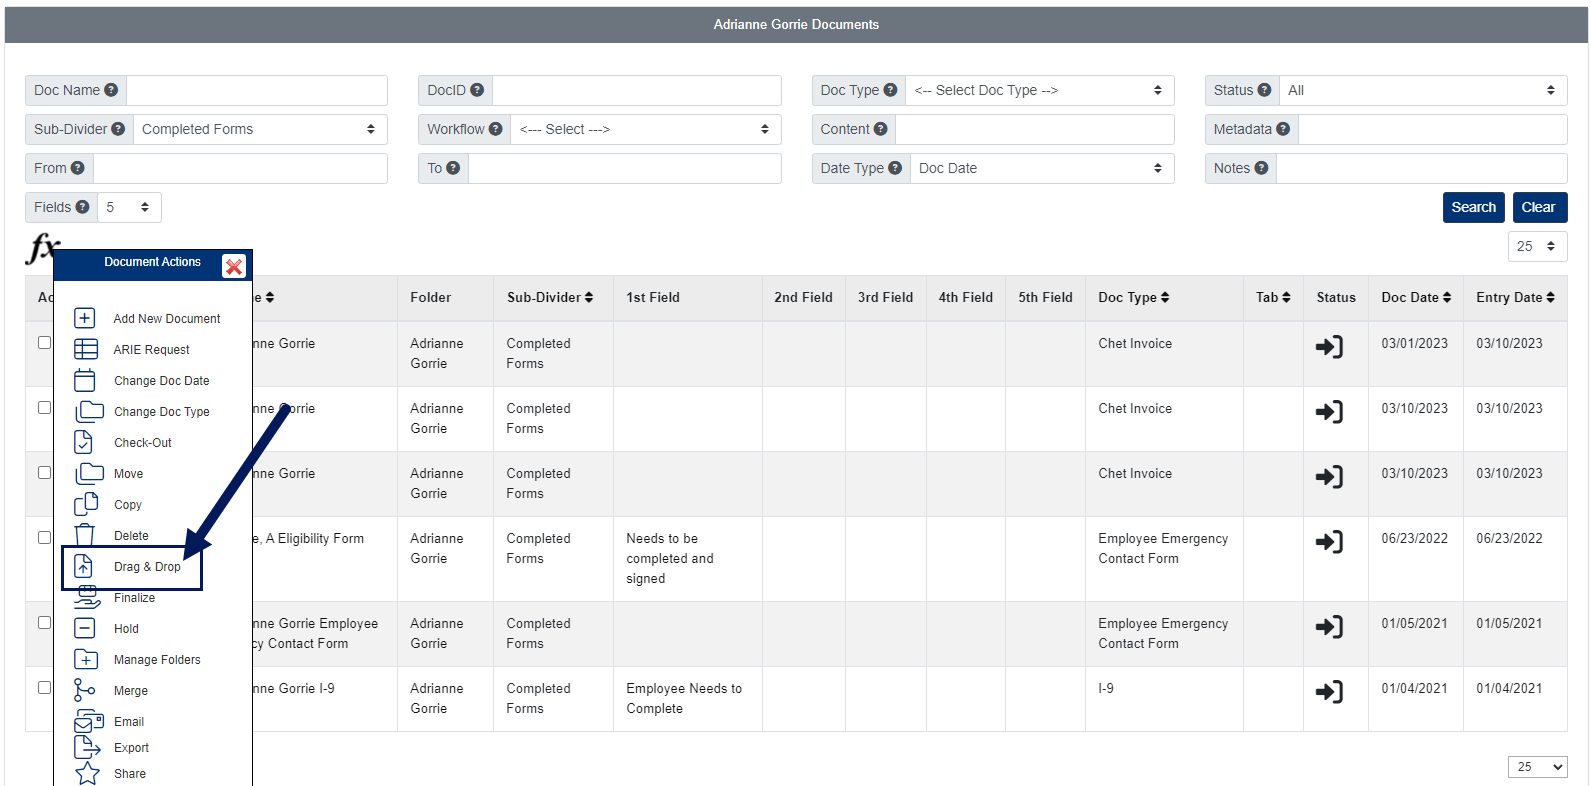
- After selecting the folder, click the Fx button above the documents list, then click the button next to Drag & Drop.
- A pop-up window will appear where you can drag the documents in.
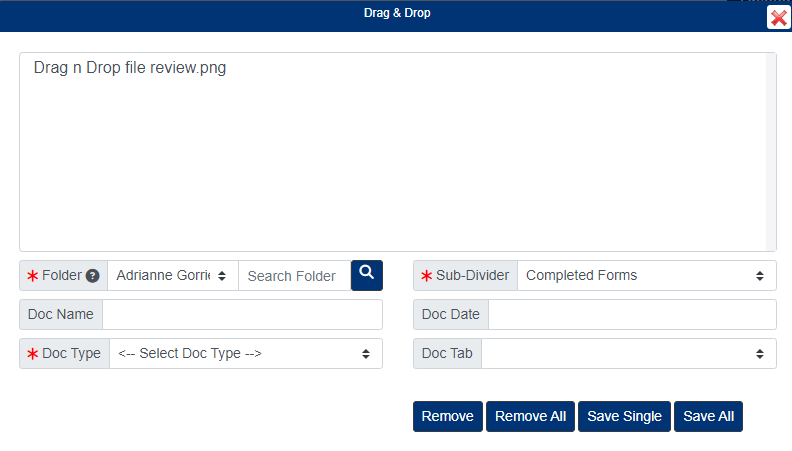
- After dragging the documents in…
- Select the Sub-Divider.
- Select the Doc Type, then fill in the required document metadata fields.
- Select a Doc Date if you do not want the documents being assigned today’s date.
- Enter a Doc Name if you wish to rename the document before saving.
- Clicking the Save Single button will save only one selected document at a time. Clicking the Save All button will save all the documents that you dragged in at once.
Add Folders
- At the top of the page, select the Cabinet you want to add a folder to.
- Click the Add Folder button to the right of the Cabinet dropdown field at the top of the page.
- Enter the required Folder Details, then click Save and Exit.